How to Increase Content Creation Using Automated Tools
By Jeanne Berg
July 8, 2021
Content creation should be a part of every website’s SEO strategy. Publishing content for your targeted audience not only drives organic traffic to your website but improves your site's authority and relevance on that subject.
Consistently publishing new and meaningful content is one of the number one drivers to achieve search engine rankings. This is because search engines perceive regularly updated content as one of the best indicators of a domain’s knowledge and credibility on a subject. The outcome of this is that you’ll rank higher in search results for your keywords and bring more visibility for your website.
However, the effort of producing fresh content can be onerous - especially if you don’t have the budget to hire a content creator. But with the advent of numerous AI-powered automation tools, content generation no longer needs to be a one-man show.
How to auto-generate topic ideas
Before any writing can begin, you have to have a topic idea. Besides producing content, there are generators that can even provide the inspiration for ideas.
Hubspot’s free idea generator, can help you to brainstorm fresh article topics. This is especially useful when you’re focused on a single niche and seem to have exhausted every angle. You just need to enter a noun to start the ideas flowing.
But deciding the topic is only the first step in creating content!
Two tools to auto-generate long and short-form content
Content generating tools can speed up and streamline the writing process.
The content creating tool, Article Forge, specialises in generating long-form content.
You can generate articles from 50 to 750 words in length which can also be scheduled to post directly to a WordPress website. Article Forge claims every article is written completely from scratch, so you'll never get duplicate or plagiarised content.
With Article Forge, you start creating an article by entering a ‘keyword’ that describes the main topic of your article and then sub-keywords which help to focus the narrative. Article Forge will then need a few minutes to process the query.
As with any tool, there’s a learning curve required to produce suitable and readable content. Sometimes the quality and relevance can be hit or miss. The more precise and developed the data you input, the richer and more relevant the result.
The outputs produced for my keywords were good rough drafts but not what I would consider the quality of a ‘final copy’ without editing. Some of the text was repetitive, some irrelevant or just down-right nonsensical.
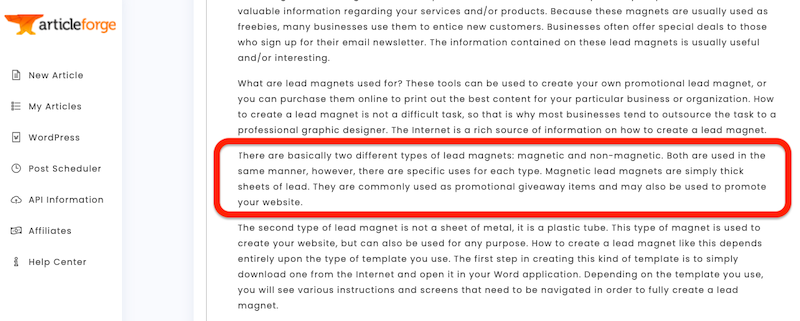
Here’s a paragraph from the output for the keyword ‘Lead Magnet’. The content output reads coherently then all of a sudden it swerves off-piste.
Article Forge has one plan billed at $57/mo or $27/mo paid annually.
The content generator Conversion.ai was recommended to me by a colleague. She found it a great resource for generating short-form copy which she could be assured was grammatically and conversationally fluent in English - as English was not her native language.
Conversion.ai has over 50 use case templates (some are still in beta) ranging from blog post outlines to email subject lines to Pinterest pin descriptions and personal bios.
With Conversion.ai, you begin by choosing the template for your use case. Then you input the topic, enter a tone of voice and click Generate. The output will display in the split screen. When generating long-form copy, you have to prompt it along by entering your own transition copy.
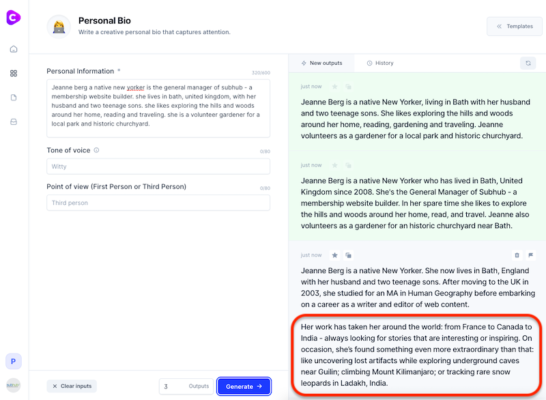
Here again, the output for my ‘personal bio’ suddenly crossed over into the realm of fiction with some very curious extrapolations from the data I entered:
Conversion.ai claims its generated content is 99.99% original and clear for publication.
An added bonus with conversion.ai, is their dedication to building a supportive community around their product with a private Facebook group, Training Academy and a daily 30 minute live Q&A session with its co-founder Chris Hull.
Conversion.ai has two plan tiers. The Starter plan, at $29/mo, gets you short-form copy generation such as headlines, descriptions and bios. While their Pro plan, at $109/mo, allows access to their long-form assistant for copy such as blog posts, video scripts and books.
In conclusion
While content generators can help with some of the heavy lifting of content creation, it’s quality clearly still needs the human touch.
Particularly important to keep in mind is that Google and other search engines can easily recognise auto-generated content and if they determine it to be without human review, sufficient value or curation, they may take action against - meaning your content might suddenly drop in ranking.
So use these tools to help facilitate your content production but remember that machine written articles still can’t equal words composed into meaningful thoughts by an organic being.
This article was human generated.
Jeanne Berg
As part of the SubHub team, I’ve been helping people build, grow and manage their membership websites for over eight years. I’ve written blogs about a variety of topics but particularly enjoy writing about web design. Though I’m a native New Yorker, I live in the United Kingdom and am raising two sons who speak with British accents. Outside work, I’m a dedicated volunteer gardener at my local park, countryside rambler and secret K-drama fan.
It can be difficult for a pure brick and mortar businesses (if any still exist) to transition to a digital environment. But it doesn’t have to be. Think of the process as digitizing your business to reach people in a different environment more effectively. Take all of the things that draw customers to your physical location, and offer them online.
Establish Your Authority
When customers visit a physical location, it is easier for them to determine if the people working there experienced and friendly. When visitors reach a website it is far more difficult to determine the type of business and people the site represents. Give your visitors a better idea of why they should trust you with their business.
Adding a testimonial section to your blog is a great way to establish your authority. Ask current clients to discuss their experiences in detail so those who are interested in your services or products are able to get a feeling for how you do business. It is the feeling of walking into a building or talking to other customers that matters in this context more than information. You need to create a digital experience of the community. Encourage social media followers to help with this project and ask if they are willing to share a photo of themselves to make it even more personal.
If you have an “About” section, be sure to include images of any awards, certifications, or relevant degrees. Link to the institutions that awarded or featured you, so as to make it easy for visitors to fact check and learn more about how these items verify your authority.
Maintain Visual Consistency
Visual consistency is as important in a digital environment as it is in a physical location. There is a reason companies have employees wear uniforms or dress in a single color, it creates visual consistency that makes it easy for customers to identify the people who are there to help them. Print ads and signs are visually consistent for a similar reason: It is important that when consumers see information about your business, they instantly make the connection. And visual “cues” make that easier.
Translated to the online world, this means you can build as much emotion as you want into your websites, emails, social media, infographics or blog posts, but it will amount to little unless your design and flow work the way users expect them to. A clean, visually consistent web or app interface gives users feelings of comfort, control, and familiarity.
Creating visual consistency online seems complicated because of the graphical nature of the environment. There are many free resources, such as Canva, that help people of all experience levels create the digital resources they need to brand and market themselves in a visually consistent way. It is important that businesses take the time to plan out the colors, typography, and type of images they want to be associated with their brand online.
Graphics are necessary for emails, social media, workbooks, infographics, blog posts, and so much more. The visual element of your digital business is as important as the way an office is decorated or the sign outside.
Offer Free Resources
In a digital environment, it is important to show people why they should trust you with their business. Testimonials and credentials are valuable for this purpose, but even better is a sample of your work.
No matter what type of business you have, there is something you can teach people. YouTube is an excellent way to promote your blog while giving potential customers something of value for free. This allows customers to get to know business owners, or employees, even if they can never visit a physical location. It makes the experience of interacting with a company feel more authentic. A marketing professional can make tutorials that walk people through how to use various marketing tools. A photographer can show visitors how to frame a shot, edit in various applications, or review photography apps. A veterinarian can make videos explaining first aid techniques for a variety of animals, grooming tips, or product reviews. You get the idea… Showcase your skills and services and prove to potential customers why they should support your business.
Your videos can be posted on individual blog posts in addition to being found on the business YouTube page. The YouTube page is also a great way to incorporate the visual branding elements the business has developed and can link to the business blog for viewers who find the company directly from the YouTube videos.
If you don’t feel comfortable in front of a video camera, tutorials are an excellent option. The key to making a tutorial truly valuable is to make it the absolute best of its kind. Don’t leave out any steps and utilize multiple pictures for each one to ensure clarity.
Create Personal Connections
Social media is one of the most commonly discussed methods of creating personal connections with potential customers. However, there is another way that is even more personal. Begin speaking at and attending conferences where your target demographic is likely to be.
Blogging conferences are a great place to get to know individual bloggers. The niche markets which are represented are extensive and most businesses find they fall within one or several. By speaking at these conferences, you can connect with bloggers passionate about your field. It is beneficial to your business and a blogger who hosts an interview with you, a review of your service or product, or a giveaway.
Attending and speaking at industry-specific conferences allows business owners to network within their field and make valuable connections. Speaking at those events lends credibility to your authority and can be featured on the company blog.
Over To You
It is possible to promote your blog simply by doing the things necessary to ensure your digital presence is as robust as your physical presence. For those businesses that operate entirely in a digital environment, this is even more important. It is vital to make the business as multi-dimensional as possible to become and remain competitive. Promote your business blog by establishing authority in your field, remaining visually consistent and recognizable, offering free resources of value, and creating personal connections with live events.
About The Author
Tracy Vides - Digital Content Strategist
Tracy is a content strategist and serial blogger who gives small businesses and entrepreneurs online marketing advice. Hit her up any time on Twitter.
When building a membership website, you don’t have to go it alone. There’s a wealth of free web tools and online resources available to take advantage of to improve your design, optimise for SEO, deliver content, investigate usability issues & much more.
We’ve rounded up some of our favorites and created a curated list of over fifty to share! None require any technical skills to use. All are free or offer free basic plans.
Online Design Tools
You don’t have to be a designer to add creative flair to your website or social media marketing. These free resources offer a helping hand with ready-made templates and tools to enhance your website design.
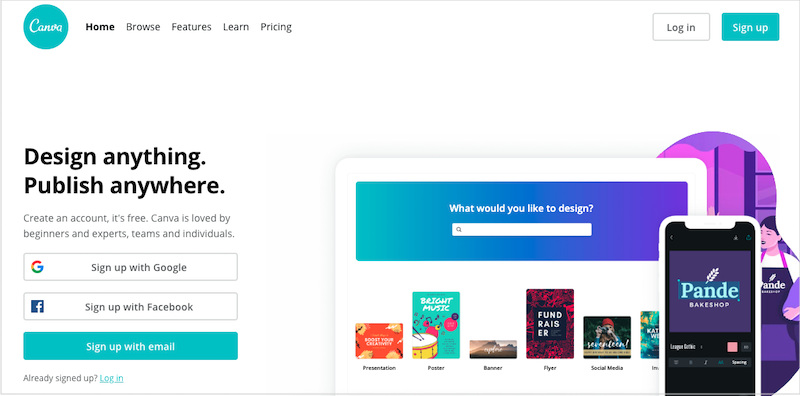
Canva: create beautiful and professional looking graphics for your website and social media channels with Canva’s ready-made templates or create a custom design of your own.
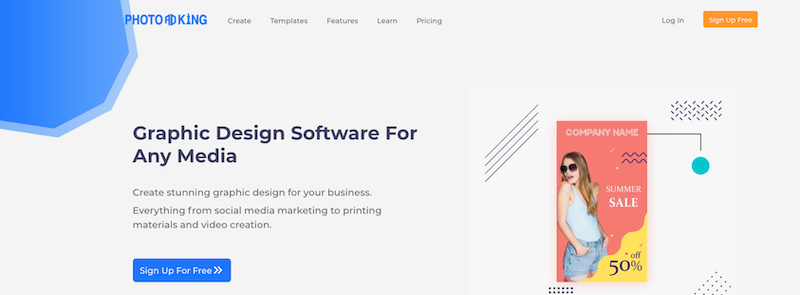
PhotoADKing: this graphic design software lets you create stunning graphics for every aspect of your business.
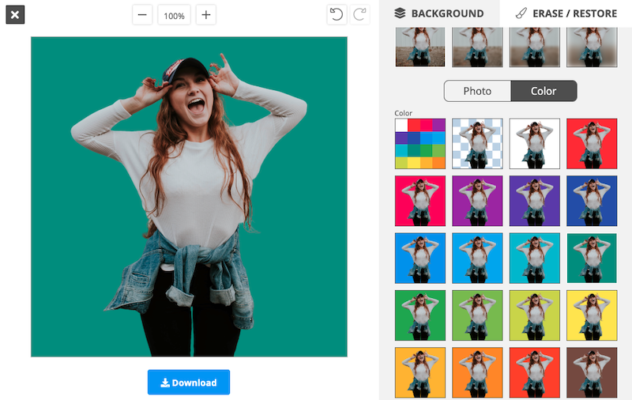
Removebg: use this nifty tool to remove image backgrounds instantly to create silhouettes or replace with a new background.
Fotor.com: removes image backgrounds and allows replacement colors, gradients and images. Bonus: the free version is ad-free.
Freepik: effortlessly remove JPG and PNG image backgrounds with Freepik's AI background remover. The tool allows three free uses per day.
SocialSizes: instant reference for the best image and video sizes for all your social media accounts.
Website Color Scheme
Color is one of the first points of engagement a visitor experiences with a website. Make sure your website color scheme elicits the emotional response you want your brand to reflect. These tools provide palette generators and libraries to find the perfect color scheme.
Canva palette generator: a color palette generator for images. Simply upload a photo, and a color combination will be created using the hues in the photo.
ColorDrop: search the library of palette combinations for the right website color scheme.
Color Hunt: a platform for color inspiration with thousands of trendy hand-picked color palettes.
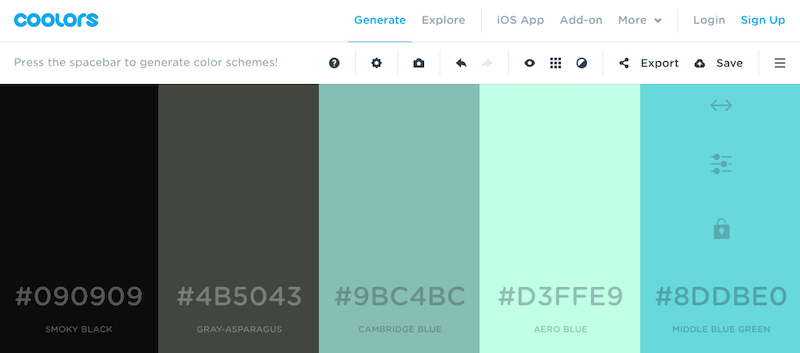
Coolors: a color palette generator that lets you pick a starting color, generate combinations at random or based on an image. Alternatively, select a palette from over one million ready-made color schemes in their library.
Logo Creators
Your brand identity starts with a logo. Even on a tight budget you can create your own brand with a template or generator.
Namecheap Logo Maker: Generate a unique logo every - tailored to your business or site through AI. Thousands of fonts, icons and colors to choose from.
Canva: Design your own by customizing one of the professionally made logo templates with the help of intuitive editing.
Looka Logo Maker: logo generator allows users to create dozens of logos based on their design preferences without any prior design experience.
DesignEvo: a free online logo maker with 10,000+ templates to choose from letting you create a unique logo in minutes.
Logaster: download a small, watermark-free logotype in PNG format at no cost. Preview the ways in which you can apply your logo.
Generate a Browser Favicon
A favicon is the little icon image in the browser tab. It serves as your brand’s representation when multiple tabs are open. Create one using these tools.
Convertico: free online converter of PNG files to ICO for favicon generation.
Favicon.io: generate a favicon from an image, text or emoji.
Favicon-generator.org: generator a favicon or search the extensive library of pre-designed icons based on color, letters or keywords to use on your website.
High-Quality Stock Images & Video
Users see before they read. Make sure your website engages visitors with beautiful, high-quality visuals. These stock libraries all provide free-use, downloadable images. Be sure to ‘optimise’ the image - so it loads fast and you avoid the ‘dribble’ effect.
Canva: besides being an amazing graphics tool, Canva has an extensive library of free images and icons.
Pexels: Amazing archive of free stock images and videos you can use everywhere.
Pixabay: Over one million photos, illustrations, vector graphics, and videos.
Pikwizard: has a searchable library of over 1 million stunning, high quality, royalty free stock images and videos. No attribution is required.
StockSnap: High resolution stock photos free from copyright restrictions.
Unsplash: nearly one million beautiful, royalty-free images and photos that you can download and use for any project.
Online Image Editors
One of the simplest design rules to follow is - be consistent. A row of images should all the same size so the page delivers a clean and professional look. Taking a few minutes to resize and crop images, delivers a powerful design punch.
Canva photo editor: another wonderful free tool from Canva that allows you to crop, resize, add effects and create collages with uploaded images.
Pixlr: a robust browser photo editor providing a suite of free online photo editing tools including the ability to create transparent PNG images.
Preview: simple copying and resizing is a snap if you have a Mac and can use its native image editor.
File Converters
CloudConvert: Online file converter supports nearly all formats. Handy when you need to convert MOV files to MP4.
ConvertICO: Free online PNG to ICO file converter and favicon (that tiny icon in the browser tab) generator.
FreeConvert.com Free online file converter and compressor. This tool also crops and trims videos.
Adobe MergePDF and CompressPDF These online tools can help you tailor your PDF embeds and downloads
Optimizing Images & Videos
Large file sizes result in a slow loading web pages which cause visitors to bounce and can affect your Google ranking. Be sure to reduce file sizes by compressing them before they’re uploaded to your website.
Compressor io: free image compression tool that reduces your file size while maintaining quality.
Optimizilla: no frills image compressor for JPEG and PNG images. Includes a slider to control compression levels along with before and after comparisons.
TinyPNG/ TinyJPG: compress the file size of your PNG and JPEG images without losing quality. The result will be a faster loading website and improved SEO.
VEED.IO: optimize your website’s performance by reducing video file sizes to enhance user experience and page loading times - without compromising video quality.
Identify Fonts
WhatFont: Chrome browser extension that quickly identifies web page fonts when you point your cursor at them.
Fonts Ninja: Chrome browser extension that lets you identify fonts on any website.
Free Icon Libraries
Use these simple graphic symbols to intuitively convey meanings and concepts to visitors and highlight content you wish to emphasize and promote.
Iconmonstr: over 300 free icon collections to choose from for your next project.
Endless icons: free icon library of downloadable PNG and SVG icons.
FlatIcon: huge database of free, editable icons in PNG, SVG, EPS, PSD and BASE 64 formats.
Check Page Responsiveness
Your web pages need to properly adapt and respond to your user’s viewing environment whether it’s a mobile, tablet, or desktop screen size. These tools make it very easy to review the user’s experience of your website on different screens and devices.
Responsinator: Get a quick indication of how your website will look on the most popular devices.
Screenfly: A free tool for testing a website’s responsiveness on different screen sizes and different devices.
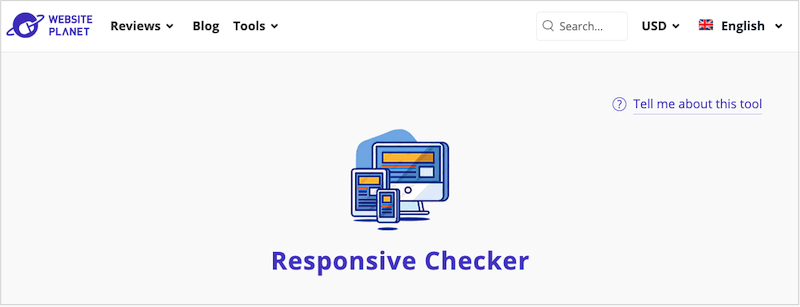
Website Planet: Instantly preview your website on desktop, mobile devices, tablet, and custom resolutions.
Chrome Developer Tools: Easily simulate how your web page looks on multiple mobile devices from your laptop using your Chrome browser.
Increase Page Performance
Lots of issues can affect a website’s website ranking. Reviewing your web page's performance can reveal areas that need improvement. Some are very easy to fix like optimising images (so they load faster) and fixing dead links. These tools make sorting those issues a no-brainer.
Dead link checker: error 404 pages damage your website's ranking and usability. This tool can crawl a single page or entire website and identify broken links for you to correct.
Check My links: a browser extension that crawls through your webpage and looks for broken links.
Pagespeed Insights: reports on the performance of a page on both mobile and desktop devices and provides suggestions for improvement.
GTMetrix.com: provides a page speed rating and diagnostics of page speed parameters.
Test User Engagement
Collecting feedback about how your visitors are interacting and navigating your site can uncover usability issues. Fixing them can improve conversions.
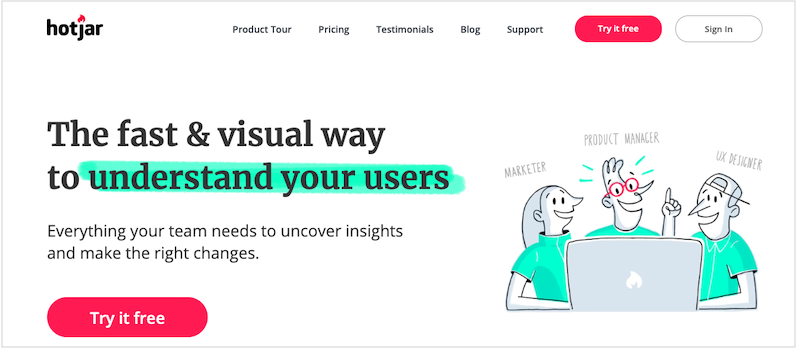
Hotjar: a recording and click map tool that reveals how visitors are engaging with your website and how the user experience can be improved.
Crazy Egg: heatmap tool that lets you see where users are clicking. You can find usability issues and lost opportunities with heatmap data. For example, users clicking on content that
Conduct Keyword Research
Incorporating relevant keywords in your content is essential to show up in search results. Your content needs to include the organic terms that people are using when searching for your product. These keyword research tools will help you learn the terms you need to incorporate to get found.
Keyword Tool: using Google’s autocomplete feature this tool generates hundreds of keywords from your query term.
SEMrush: discover what keywords your competition is ranking for. Free plan allows limited daily searches.
Ubersuggest: delivers keyword suggestions based on your seed term or a competitor’s domain.
Wordtracker: serves up thousands of popular search phrases based on your seed term.
Website Content Tools
ChatGPT: an AI tool that can generate multiple forms of content based on the prompts you enter
Wayback Machine: a digital archive of the World Wide Web let’s you search for old web pages via a calendar timeline.
Character Count Tool: a useful tool to count characters when you need to stay within a limit for tweets and tags.
Infographics & Presentations
Xtensio: a collaboration platform that helps teams capture their vision into online documents. With it's easy-to-use features, it's the perfect tool to create, share and manage living folios.
Easelly is a simple infographic maker that allows you to visualise any kind of information.
Visme: create professional presentations and infographics online. Choose from thousands of templates and graphics that you can publish online or download.
Improve Teamwork
Slack: a communication & collaboration tool for teams of any size. Searchable public and private channels allow you to keep all your correspondence in one place.
Notions: an all-in-one collaboration platform that integrates note-taking, project management, and team collaboration features.
FreeConferenceCalls: provides HD audio conferencing, screen sharing and video conferencing to create the ultimate collaborationtool.
Screen Recorders
Must have tool for website admins. Create instructional recordings to share with members or screen record issues that need troubleshooting by your web support.
Veed.io: screen capture meets powerful online video editing. Add subtitles, create overlays, edit scenes and more. Perfect for product demos and walk through videos.
Screencastify: easy to use screen recorder - just add it to your browser. Record, edit and share videos in seconds.
Screencast-O-matic: intuitive tool that lets you capture any part of your screen and start recording.
Video Editing
Motionbox: helps teams create & collaborate on video content and share ideas together in real-time. You can perform basic video editing tasks, like cutting, trimming, cropping, resize, add music and add subtitles.
CapCut: is a free versatile video editing platform that has gained popularity for its user-friendly interface and robust set of editing tools - trim, cut and arrange clips, add transitions, text overlays and music, as well as apply various filters and effects. CapCut’s seamless integration with popular social media platforms facilitates easy sharing of the created content.
Screenshare
Screenleap: allows you to instantly share your screen and conduct a 30 minute meeting. Just initiate and send the generated link to participants.
Conduct Webinars
Loom: capture your screen and record with your front facing camera, all at once and then share it.
Zoom: a video solution that allows you to host webinar events for up to 100 participants. on-demand or recorded.
Ready to transform your knowledge into an online business with a membership website but don’t have the time or skill to build it yourself? Our design service could be the solution.
Bekah's vision led her to become an online fitness coach over eight years ago. She recognised that, for many of her in-person gym clients, finding the time to workout was a balancing act between their job and family responsibilities.
A crucial element of any membership website is the "About Me" page. This page allows you to introduce yourself, build trust, and showcase your credentials to visitors. To make a lasting impression, follow these 10 essential tips for crafting the perfect "About Me" page.
A landing page is a powerful tool in online marketing, designed to direct visitors toward a specific action. Unlike a full website, which serves multiple purposes, a landing page focuses on a single objective -convincing visitors to engage with your call to action.
If you're contemplating setting up a membership website, you may be looking for a little inspiration. We've gathered some outstanding examples using the SubHub platform. Why reinvent the wheel? Take a look at what others have done on their membership websites. Our guess is something will twig some ideas for you to implement in your own website.
Let's start by confirming that your business or organization is a good fit for a membership website.
1. What is a membership website?
Simply put, a membership site offers content that requires a recurring payment for access. But that doesn't mean that all your content should be behind a paywall. In fact, you wouldn't want the entire site to be restricted to paying customers. Some of your content should be free so that you can give website visitors a taste of what you have to offer before they buy.
2. Why start a recurring income website?
In a word, monetization. Many coaches, experts and trainers have a world of content such as e-books, downloads, blog posts, PDF's, infographics and more. But all that great content isn't providing any income until it's gathered together in an organized fashion that people can consume and pay for.
3. Isn't a membership website a lot of work?
On the contrary, a membership website is the perfect online solution to keeping all your content in one place, making it all much easier to update. Content management just got easy! Online courses can be evergreen and make money year after year, allowing students to sign up anytime. That means they can join the course any time and you don't have to be there to moderate.
4. Why do people join membership websites?
First and foremost, they want to gain access to you and your content in a way that is easy and convenient. A membership website lets you curate your assets in one place so your members never have to go anywhere else. Secondly, you can give your members unlimited access, allowing them to review the material over and over again. You also have the ability to cultivate a sense of community. Many of the web platforms available offer features such as a member directory and a member forum where your customers can get to know each other and benefit from each others' experiences.
Fitness & Wellness Websites
The membership website model is ideal for selling training videos in the fitness & wellness niche. Whether you specialize in weight training, yoga, weight loss or nutrition, there is always an audience waiting to jump into evergreen membership content they can consume at their own pace.
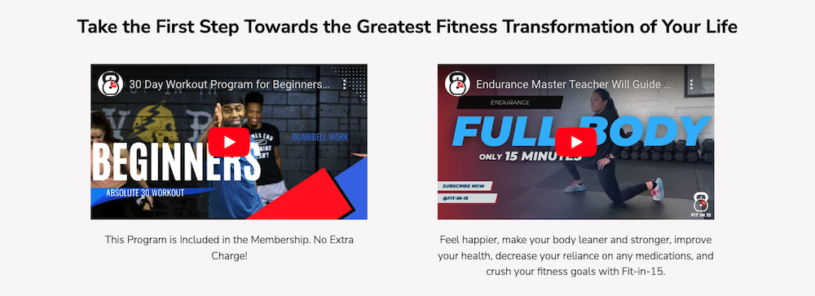
Bekahfit.com This women’s fitness site uses embedded video to allow her clients to follow her workout routines as she demonstrates. The small padlock icons on each image tell public visitors that the content is behind a paywall.
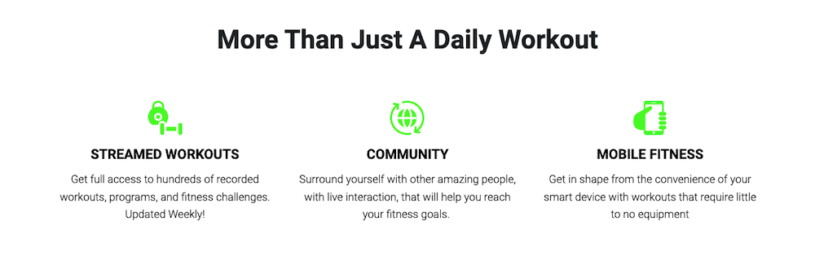
Fitin15.io On this fitness membership site, users can join the membership to gain access to a combination of streaming video and downloadable files, such as .PDF and audio files. Special reports, ebooks, meditations, and healthy recipes are available to logged in users.
Relentlessmuscle.com This workout membership site focuses on community and daily live content to both encourage membership and retain the interest of current members.
Business & Life Coaching Membership Websites
The coaching industry has never been bigger than it is right now. The estimated market size of the coaching industry is $15 billion in 2019, with a 6.7% expected average yearly growth rate. If you're an expert in your field you can't afford to over look this online opportunity for a profitable membership website.
Aaron Chong of Ultimatecloserclub.com makes good use of Facebook testimonials and a popup chat message bot to convert visitors into members. Once a part of the community, logged in members have access to a wide range of masterclasses and courses.
Runforgod.com offers their members various challenges and opportunities to enjoy running as part of a community. A coaching program is also available. The site uses the SubHub built-in FAQ block on their homepage to field common questions.
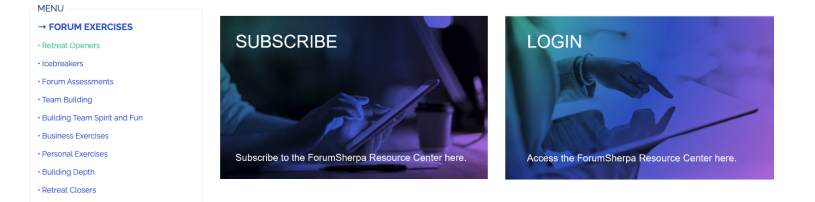
Resourcecenter.forumsherpa.com is a resource for Forum administrators to access instructional and informational articles on group leadership. A vertical sidebar menu on every page helps visitors understand at a glance how the content is organized, with easy access to categories and sub-categories
Expert Advice
tinnitustunes.com is an online information resource for the medical condition tinnitus. It provides expert advice on available treatments and techniques in the form of classes, downloads and relaxation audio files. The website provides free information to the public along with member only content for both sufferers and clinicians.
Financial and Investment Advice Membership Websites
Expert stock traders and financial advisors are always in demand, and that trend is not likely to change in the future. As Olivia S. Mitchell and Kent Smetters put it in their article "The Market for Retirement Financial Advice", "The longterm shift away from traditional defined benefit pensions toward defined contribution personal accounts requires us all to become more financially sophisticated than ever before." Advisors and coaches with stock trading and investment experience have a huge available market for recurring income from a financial advice membership website.
leadlagreport.com A dynamic video banner draws visitors in to find out more about this investment strategy report site.
oatinformation.com This niche financial strategy site focuses on the oat market and makes extensive use of the blog feature on their SubHub site to keep both public and logged in visitors updated on the latest oat information.
sltrades.com This site uses watchlists and alerts to keep members up to date on trading opportunities and strategies.
Industry News
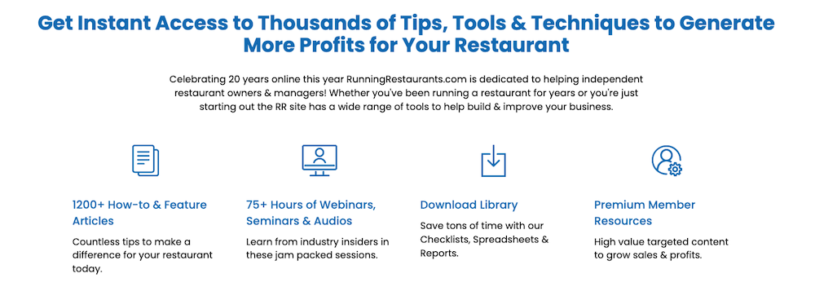
runningrestaurants.com is dedicated to helping independent restaurant owners and managers by offering a wide range of online tools and resources to help build and improve their businesses.
profitandbeauty.com This site offers tax and financial management advice to professionals in the beauty industry. It offers courses and a selection of e-books in the online store.
Courses and Online Learning
Many membership websites also feature online learning. The SubHub platform lets you easily offer multiple online learning options. Learning material can be included in membership, sold as downloads in the stores or as a course.
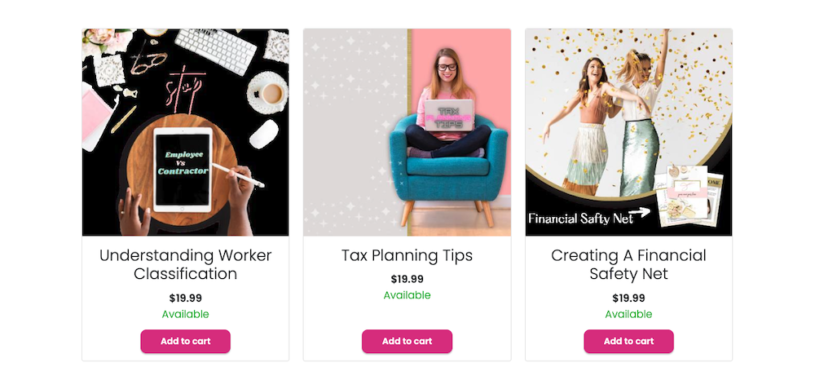
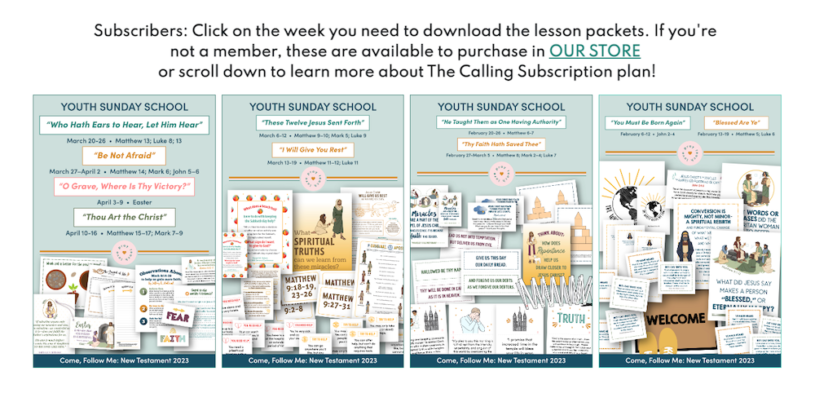
loveprayteach.com sells access to their printable Sunday school handouts multiple ways. Members can access all the lessons available in their membership tier. Or website visitors can purchase individual lesson packs as needed from the built-in online store.
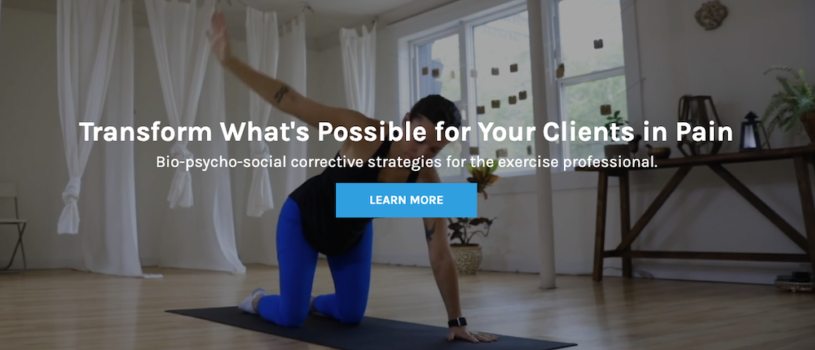
functionfirsted.com provides a comprehensive range of online courses, webinars and workshops to inform pain management practitioners in using evidence-based methodologies and exercise solutions to improve patient outcomes.
gentlesleepclub.com The Gentle Sleep Club's soft star-studded background is perfect for a site that helps busy mothers get enough sleep themselves as well as getting to know their child’s unique sleep personality.
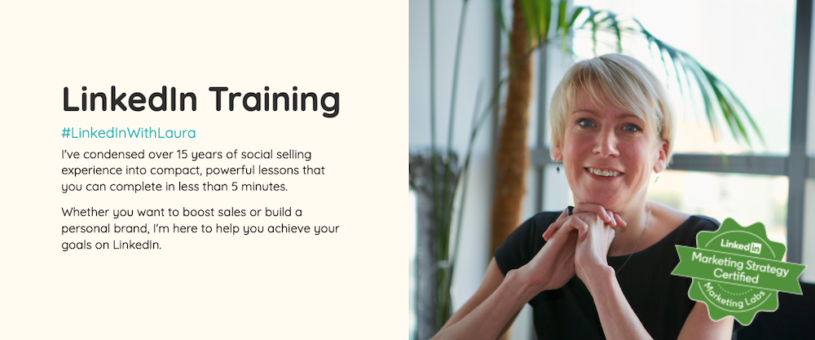
profilebasedmarketingacademy.com offers entrepreneurs specialised social media training for LinkedIn. Laura has condensed over 15 years of social selling experience into compact, powerful lessons that can be completed in less than 5 minutes.
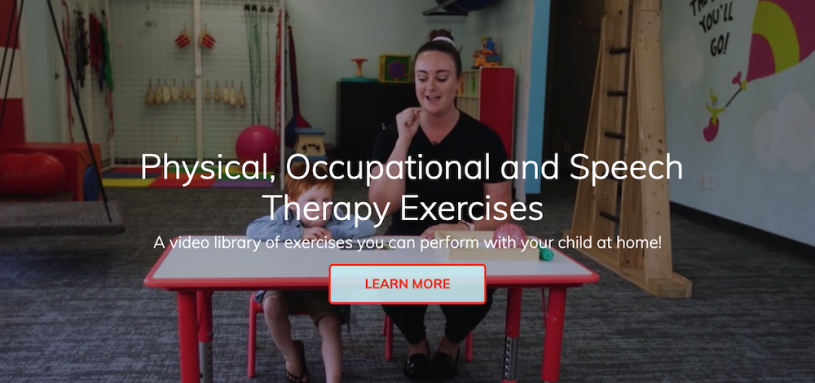
raphaeducate.com This membership website offers parents an array of online physical, occupational and speech therapy exercises they can do at home with their children. The site contains an extensive library of embedded video exercises for parents to choose from once they sign up for the membership.
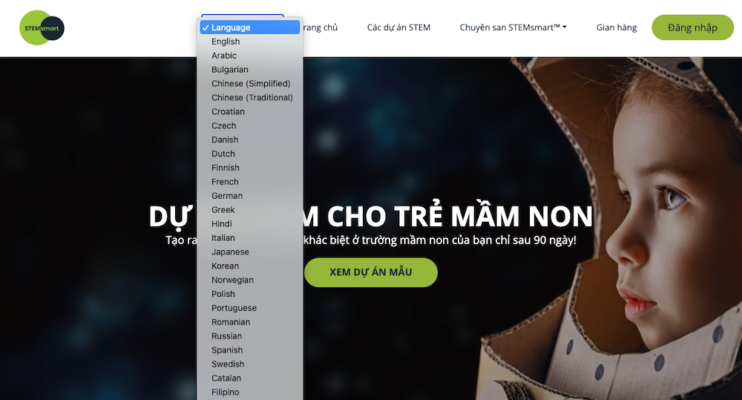
stemsmart.net This membership site is a teaching resource for the parents of pre-school aged children. This site is unique in that it not only offers a large assortment of courses and trainings, but can be viewed in many different languages.
Publish an online magazine
horsemanship-journal.com uses SubHub to delivery an digital version of their monthly print magazine. The online magazine version helps to improve audience reach, generate leads and increase revenue potential.
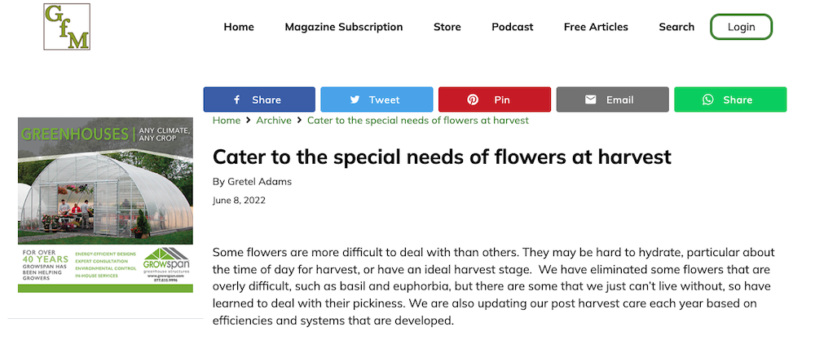
growingformarket.com is the online magazine for market farmers. The site regularly publishes new content but also hosts an extensive archive resource of over 1600 past articles. Their membership website lets them sell subscriptions, books and apparel. Additional revenue is generated by utilising the article page sidebars for advertising opportunities.
How to Create and Grow Your Own Membership Website
Now that we've seen some examples of membership websites others have created, let's take a look at how you can get started on yours.
Creating your own membership website has never been easier or more affordable than right now. With an assortment of web platforms and expert help available, your online business can be generating recurring income in short order.
SubHub is one of the easiest to set up and affordable platforms out there. Course set up is a breeze with the course editor, and you can choose a beautiful modern website template, or create your own design using customizable layouts.
Follow these steps for a quick start and you'll be well on your way to your own membership website.
1) Sign up for a free trial with SubHub.com 2) Select a template and begin customizing your site 3) Set pricing and payment frequencies for your services 4) Get help with any of the above at [email protected]
Simply put, a membership site offers content that requires a recurring payment for access. But that doesn't mean that all your content should be behind a paywall.
What is evergreen membership content?
Evergreen content is content that is available to users any time. It allows them to sign up to an online course and consume the material at their own pace.
Why do people pay recurring fees for a membership website?
1) People love curated content that is available to them at their convenience. 2) People want to have access to advice and coaching from a particular expert who they follow. 3) A sense of community is an important aspect of any membership website. Users want to interact with and learn from each other as well as from the leader or administrator of the website.
Isn't creating a membership website extremely time-consuming?
The key is to be organized before you begin setting up your website. Know your audience and what they want, and how much they will pay for that knowledge. Many of the membership website platforms on the market today make it easy to create courses and membership content designed for easy set up and maintenance.
Selling digital PDF downloads and printables has become a highly popular and profitable online opportunity for individuals and businesses. Whether you're an educator, subject matter expert, coach, or crafter, creating and selling digital products can be an excellent way to generate passive income.
Launching a membership website is an exciting way to generate recurring income while building a loyal community around your content, expertise, or services. Whether you're offering online courses, coaching, or a private community, this step-by-step guide will help you get started.
In the world of membership sites, attracting new members is only half the battle—the real challenge lies in keeping them engaged and subscribed. Consistent, relevant content of course underpins success in membership businesses.But why?That's where understanding the psychology behind why people stay subscribed can help you craft a better, more loyalty-producing experience.
Operating a successful membership website doesn't end with recruiting new members. You need to ensure they keep coming back with engaging and timely content. But if you aren't strategic about it, that content will become a jumble of ideas in your brain -- and will look like exactly that on your site.
The covid pandemic has taught many yoga studios the value of having not just a simple website but one that allows them to generate an ongoing income stream.
Offering live or recorded yoga classes online can transform your yoga business by providing exposure to students around the world, increasing your income and providing the ability to upsell other products like retreats, courses or products.
Of course building a website can seem an overwhelming task at first. But, these days there are a wealth of affordable and easy-to-use tools for beginners that can make creating a website a weekend project.
SubHub’s membership website builder is a platform that provides everything you need to build and launch a website, accept payment and manage the members who are paying to access your yoga content. It's easy to expand your yoga practice with a membership website.
With our beginner-friendly platform, there’s no reason to feel intimidated. We take care of the tech and offer ongoing, hands-on support for when you need it.
So let’s outline the first steps to building, launching and getting members for your your website.
Don’t try to appeal to everyone. Instead refine your focus so you can target a specific audience. This makes appealing to and reaching an audience all the more easier.
For example, you may just want to focus on yoga for pregnancy or morning meditation or 5 minute sessions or chair yoga.
It might sound counterintuitive to be limiting your potential audience reach but focusing on a niche allows you to craft content specific to that audience’s needs.
By narrowing your focus, you can strengthen your online content offering because success comes from meeting the needs of an audience.
This also allows you to refine and tailor the keywords you use in your titles and copy making it easier for people to find your site via search engines.
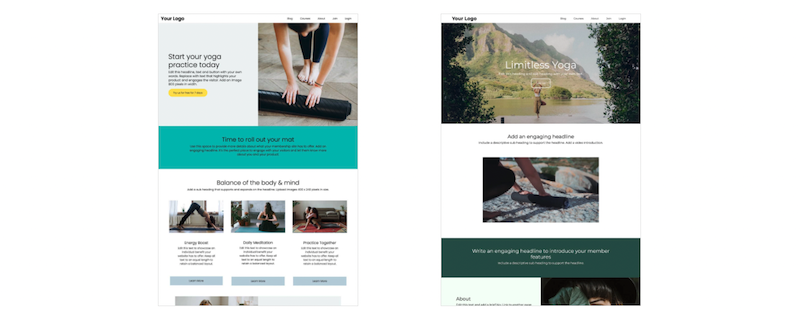
Each template layout features sections designed to inform and convert visitors to members. But you can also customise your homepages with new layouts from the section library.
You should have a minimum amount of content available to members. I would suggest at least 14 pieces of content which could be a mix of blog posts and videos. Then regularly post new content to build your inventory and show commitment to your members.
You can also repurpose content into courses which can be sold individually or included in a membership. Sometimes it’s how you package and present content that can attract a subscriber. For example, a course that organises specifically themed content into a collection can provide a user with an easy to follow path into daily yoga practice.
Where to find high quality free use images, icons and graphics
There are plenty of sites where you can get free use, high quality yoga-themed images and video to make your site visually appealing. Pexels, Unsplash are my favorites and Canva is a superb free, all-round graphic software for creating media posts and more.
4. Get Organised
Your site’s organisation is very important. Your members need to easily find the content they are looking for. Spend time mapping out your navigation and assembling content into easily accessible categories. Think about the user experience. Users should be able to find the content they want in just a click or two.
This filter allows members to search for content that meets their specific criteria. The filter is particularly useful for searches that include multiple practice variables that you can define - such as duration, style and focus.
5. Build Your Audience
The best promoter of your website is yourself!
Using social media platforms to promote and drive traffic to your membership website is a must. The platform you chose varies according to where your audience naturally hangs out.
This might mean doing YouTube videos, Instagram Stories, TikTok LIVEs and expanding your practice from the studio into the digital landscape.
Use keywords in your titles that match what people are searching for so they can find your content.
An important part of any marketing strategy is consistently showing up. This is all part of the process of building trust with your audience. By witnessing your commitment, you'll create loyal followers.
6. Grow and Nurture Your Email List
In order to market successfully, you need to capture a visitor’s email address with an opt-in lead magnet.
This is easily done by offering something free in exchange for their email. It could be something as simple as a checklist. Of course, the offer needs to be relevant and of value to your prospective audience.
Then you must nurture this email list with a followup email sequence.
Conclusion
There’s a lot of free yoga content out there but users will join a membership website for the personal experience, connection and authenticity.
Your website doesn’t need to be perfect before you launch but it should be professional looking and provide value. But keep in mind that as with any experience, it is a continuing process that will improve as you learn and grow.
Creating a pricing page that converts isn’t just about listing numbers. It’s about making it clear, transparent, and easy to compare. When customers understand exactly what
Your website homepage is your brand’s first impression, and creating an engaging experience is crucial for keeping visitors interested and encouraging them to take action. Whether you’re selling a product
Repurposing your video content allows you to maximize its reach and impact across different platforms. Here are 10 ways to repurpose your YouTube videos to market your membership website:
YouTube is one of the most effective platforms for attracting, engaging, and converting potential members to your membership website. With billions of users and an ever-growing appetite for video content, leveraging YouTube can help you build brand authority, drive traffic, and grow your membership.
Kate Faulkner, founder of PropertyChecklists.co.uk, has created a valuable resource for aspiring property developers and professionals. By offering an array of detailed checklists, expert advice and access to a trusted network of service
Tony Eyers launched his membership website to offer online harmonica lessons to share his passion for music while providing value to both beginners and seasoned players. By offering a combination of free content